We each made a potential head for the puppet in a different style to see which would be the most successful.
This was my head made of tights stuffed with wadding and sewn to form features. The moustache and eyebrows were wool twisted with beading wire to hold them in a rigid shape. Although this was effective it didn't have the presence that we had imagined.
The head that Rhyan made had much more three dimensionality to it and in my opinion was a little more creepy which was perfect. We decided to add false eyelashes and a moustache made in the
same way as my original head.
The final head.

I incorporated wire into the rim before sewing it onto the main body of the hat, this made a wonderful mad hatter shape when finished.
Initially we used velcro to stick the hat onto his head but this was not successful as it kept moving. It was finally secured using superglue.
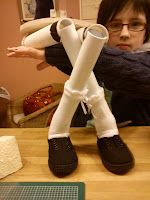
Rhyan then made the body out of plywood cut into a frame and jointed plastic tubes for the legs. There was no need for arms as these would be incorporated into the costume.
Once the body was finished I took over for the costume. Firstly there was a shopping trip required!!! A troll around the second hand stores of Gravesend produced a pair of black trousers, a red jacket and childrens shoes - customising the outfit would be much quicker than making one from scratch! (An excellent tip I have since recieved is to shop for childrens wedding outfits in the sales as these look like miniature adult costumes.)
I stuffed a pair of childrens socks with wadding and glued them into the shoes with super glue (incase anyone is interested these were size 4 shoes) then attached them to the puppet legs with more glue.

This gave them enough movement on the ankle to flex with the puppet legs and also weighted the legs to move in a more realistic manner.

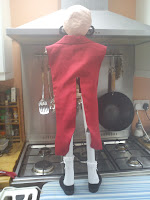
The jacket was a perfect colour but much too large at a size 14 so I cut it down to size and re-seamed the edges, creating two tails in the extra length at the back.

I elongated the gap between the tails so hand operating the body from the back would not disturb the costume.
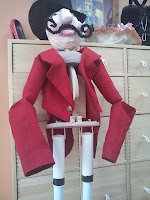
The arms were more tricky as they would need to have a stuffed upper arm but a lower sleeve big enough for a puppeteer to put their arm through.
 I created a tube closed at one end for the upper arm and stuffed this with wadding, seaming the open top into the arm hole, attached to this at the elbow was the bottom of the original cut down sleeve.
 The finished jacket.

The trousers were very easy to create, I cut off a leg from the originals and seamed up and down the centre, reinforcing the crutch with overstitching several times.
I then cut up the middle of my two seams and turned the trousers right side out. The waistband was created by turning down the fabric twice rightside and overstitching top and bottom, finishing off with a button glued on centre front. Any excess was adjusted by tucks at the back as this would not be seen.

The shoulders were stitched into place around the plywood frame.
The front was nailed into the hip cradle and sewn onto the shoulders before stuffing and hand seaming closed.
All the clothes were then stitched into place. A false shirt front and a cummerbund made of black ribbon completed the look.
 |
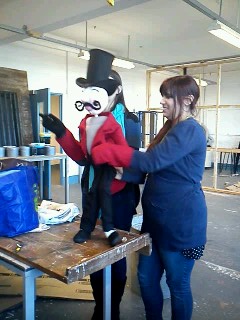
| Early rehersals for the movements! |


No comments:
Post a Comment