After making Judy the Punk I wondered what Henry the Horse would look like as a Punch and Judy style puppet. I decided to make the head out of styrofoam as I wanted to compare the detail achievable with polystyrene when carving.
Working in the same way as for the polystyrene head I drew the outline of the horse onto the block and roughly hatched out the shape using a bread knife.
I then drew on the facial contours and hatched them out in the same way.
Ears will be adding onto the block once the face is carved.
The finer details of the nose, mouth and eyes were created using a smaller snap blade craft knife.
The ears were carved to shape before sticking into place with pritt stick and covering with a further layer of brown gummed paper. This was not an ideal solution (Bostic two part adhesive is the best glue) but I had limited resources at home and this provided a firm join.
Once both ears were in place I sanded the head with fine wet and dry all over. The hole to allow hand operation was carved out from the back of the head and a groove for the thumb created between the cheeks.
The entire head was primed with two coats of white paint before painting. Be careful what paints you use on styrofoam, I used water based acrylic which will not cause it to melt, if you want to use other paints then cover the sculpture in several layers of papier mache before painting.
This picture clearly shows how the head will be operated.
The head after painting and the addition of a mane. This was the left over sheepskin from the Judy puppet.
I made a sleeve for the neck out of an old white cotton bed sheet and painted it to match the head. The long side was machine stitched together and the mane pinned into place and handstitched down.
Glue the neck to the back of the head (I secured it into place with dressmakers pins while the glue set) and finally brush the hair into place with your fingers.
The final article!! Perfect for a chat over the fence.
After several hours of patient tuition this morning I was able to create this second draft of the shadow puppet movie complete with a sound track and special effects!!!! Hooray for the magic that is imovie.
I now have a large headache but an even larger sense of satisfaction!!!
I have put a few pictures of the shadow puppet action stills that were shot as a demonstration to see how successful we could make this. Please excuse the slow running of the pictures I am working with an old laptop and movie maker and can lay no claim to being an expert. (That's Rhyan and Lauren's job!!)
Even though these are rough I am pleased with the way the puppets moved and excited by the colour gel used in Mrs Henderson. The trapeze was created using a piece of wool and the flow makes the action more believable. We are working together to create more background for the circus scenes and then the puppets can perform in a more exciting environment.
Hi I was wondering if you could give me any improvements or critisism for the puppet head, I feel it needs something but am unsure about what that is...?
This act is not only hilarious but cleverly uses a mixture of the puppetry and real. It might be wonderful to use an element of this in the main puppet.
The Punch and Judy style head is created using a base of carved polystyrene. First draw the profile of the head. If the puppet is to have an enourmous nose and chin only draw to the base of these and add more polystyrene to create the length. Carve the rough outine out.
Draw the guidelines for the facial features on the front, narrower side of the block. Roughly carve the shape creating the contours of the face.
Rough shape completed I am ready to stick on the additional pieces for the nose and chin. When sticking polystyrene together you have to be very careful which glue to use, I used Bostic general purpose adhesive which is a contact adhesive. Smear a thin coat onto one side and rub the two pieces together to transfer the glue, allow to air dry for a minute before pressing together.
The glue forms a strong bond but if additional strength is required you can use dowelling rods in the centre of the join.
Nose and chin are carved and I have decided to use the same method for ears. Initially I stuck the ears on as blocks however I soon had to remove them to carve them properly and restuck them on afterwards.
All the carving is now done and the head needs further strengthening by coating it with papier mache. As the polystyrene will remain in the core I am only applying two layers, one of newspaper and one of thicker brown paper. An extremely lightweight head can be created by removing the core once several layers of papier mache have been applied (minimum of four) allowing mechanisms for movement to be placed inside.
The papier mache was agonisingly slow to complete each layer taking two hours, this was mainly due to the protruding contours of the face .
The brown paper layer was marginally quicker as the PVA and water mixture had not completely dried from the first. However a quicker method might have been to use pregummed brown tape (shown in the bottom right of the photo) which I used to seal any gaps on the head once it had dried .
Once the head was completely dry ( I left it overnight ) the paint can be applied. All the paints I have used are water based acrylics. First a base coat of white was put over the entire head and then I slowly built up shadowed and highlighted areas.
Once the shading is complete her eyes and mouth are drawn then painted on.
Adding white highlights to the eye makes it come to life.
It was at this point while mulling on who my Judy would be that a character suggested itself to me based on her name. Judy is a Punk....by The Ramones.
She immediately had to have safety pins through her nose and ear!!!!!! The search for the perfect hair began.
This was a strip of purple fake fur.........a good colour but not feminine enough.
This was a remnant of sheep's hide an absolutely perfect hair effect but not Punk enough
I created this mohican out of blue felting wool which looked excellent but a bit stark, more Punch than Judy. I decided to go for the best of both and wrap a strip of hide around the mohican to give a two tone effect.
Attaching the hair to the scalp without a glue gun proved very awkward. The blue centre section was attached with a strip of double sided sticky tape, I then sewed the hide through this and secured the edged of that with a combination of more tape and a few strategically placed dressmakers pins.
The finished head.........................................Judy is a Punk!!!!
Monday, 7 February 2011
just found this image on google though it was really simple circus scene which seems to made using lego very cleve and simple
I really like the use of colour as well as black and white in this film by Lotte Reiniger. I know it is stop animation but the use of colour gels embedded in the puppets might be fantastic. Are we completely sold on a kaleidoscope background if not a circus tableau might work just as well, I'll draw some and bring them in for Thursday.
I have just found the most excellent selction of kaleidoscope video's on you tube. Try putting it on mute and listening to the Benefit of Mr Kite!!! This is just what we need.........do either of you know if you can download these and who to ask for permission?????
The bee gees cover of mr kite in the film st peppers lonely hearts club band !!! Thought might get a not so trippy impression of the song though it is still pretty odd
I started by researching ring masters what they wear who they are where they are from ect.
The first thing I thought of was a top hat, red coat and moustache remember the ringmaster is the most important performer in the circus and is often the owner and artistic director In the film Big Fish starring Danny Da Vito he plays a ring master and if i remember is a werewolf his character is very interesting and there are a lot of odd circus 'freaks' below is a link to a circus scene in the film
Also has we now have specific characters I have chosen to design a shadow puppet using Mr kite as my character if that is all right with every one ? Apologies if my first blog is awful didnt really know what to write.
I have made my first puppet and it feels a little like creating life, thankfully a lot less painful than childbirth although the small stitches did make me squint. My partner said I was possessed by my creation as I could hardly put her down until she was complete. Here is her journey the fabulous Zsa Zsa Gabor of puppets!
Her frame was a simple contruction of dowelling for the arms, legs and spine. Three 6cm pieces for the shoulders and upper arms and two 5cm pieces for the lower arms.
They were connected with wire loops created by bending round the dowelling to get the perfect width. and fixed into place by taping down with masking tape. This is not the most permanent of joins and could be made better with glue or duct tape.
The shoulders were connected to the main spine of the puppet by notching both to create a cupped joint and secured in place by twisting wire around the join. Her head was originally going to be a cotton reel however mine had too large a gap (the old fashioned fat reels are the best) so I used a stick cut to the same size with the lower third cut again to create a moving mouth. I needed to drill a further three holes into the centre of the stick, one central just slightly bigger than the dowelling rod and two smaller either side to thread elastic through to operate the mouth.
The final puppet frame just before I started to stuff the body. The head is attched to the spine at the back by a piece of wire pushed through a predrilled hole to secure it in place. To animate the mouth you thread shirring elastic through the smaller holes on the entire head and tie firmly at the top, this will make the mouth return to closed when you operate it. To make it open thread string through the small holes in the lower jaw and tie off at the back of the head. The string is then run down the body in a straw attached to the back and tied off to a finger loop made of wire to enable easy operating.
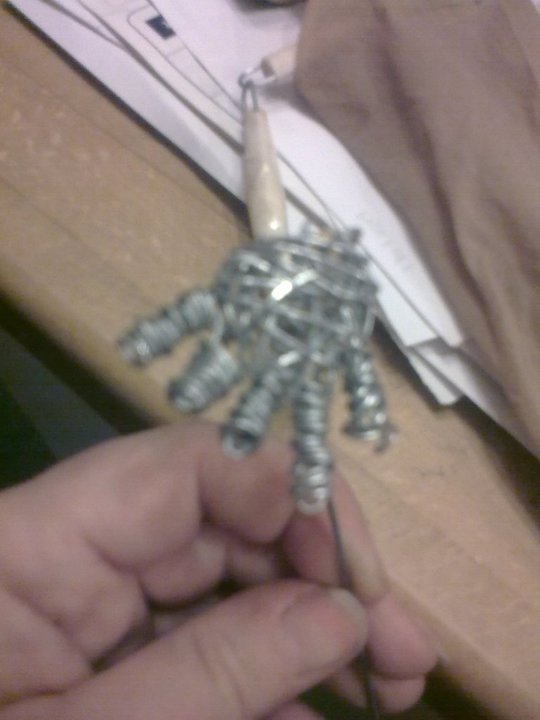
Her hands are made of twisted wire and animated by wire rods connected to the underside. She could equally well be animated by strings attached through the hand. The loose action of the wire joints means that you can easily manipulate the arm.
Tights are an excellent way of creating flesh and fleshy contours as they do not fray and can easily be connected together and sewn to create fantastic expressions. A favourite artist of mine Lisa Lichtenfels uses tights to create wonderful lifelike sculptures.
Once you have stuffed the body then start to create contours by stitching into the wadding to create lines. This is her after torso, boobs and belly have been completed, starting to come to life.
Side view with part of the costume already started ........ she was crying out for nipple tassles. Alas disaster strikes when I start to carve the head, her neck snapped!!!!! Because I had already sewn the body around the spine there was no way I could get to the snap to repair it so drastic action was required......OFF WITH HER HEAD!!!!
The new head is made of wadding covered with stocking to remain light as there would be no spine to support it. Alas the moving mouth has been lost in the repair. In future I will carve any heads before attaching them to the body.
She is starting to take on a character of her own now an ageing star - still legless!!!
Arms were fleshed out by wrapping them in wadding and sewing strips of tights around the outside. The legs were formed much the same way except they are not jointed and hang loose to provide incidental movement or for easy positioning if she is seated.
Finally she is finished ..........a spangly G-string matches the nipple tassles perfectly and a shawl preserves her mystery. "I'm ready for my close up Mr DeMille!!!!"